Showing posts with label Recipe. Show all posts

Saturday, December 17, 2011

Pride comes before.. a broken oven- Baked Frito Pie & Blender Beans

I have quite a track record for good intentions gone horribly wrong. Mixed with a chronic lack of patience and my tendency to assume I don't need to follow anyone elses' instructions (can you say pride?), the results can be catastrophic. 

The most recent example of this- while trying to clean the cooked-on gunk out of the bottom of my mom's oven the other day so she could cook her famous oven-roasted candied pecans without filling the house with the smell of burnt grease and goodness-knows what else, I somehow managed to destroy both the top and bottom cooking chambers completely.. just in time for Christmas. Epic fail.  

Turns out I don't know everything. Sorry Scarlet O'Mamma.. and thank you for loving me in spite of myself. You're the best :)


But prior to its demise this old oven had a few shining moments, the latest being an Oven-Baked Frito Pie. I found the recipe here, and adapted it a bit to fit my kitchen (my adaptions are in italics).

I grew up on the traditional chili-and-cheese-smothered-mass-of-corn-chips version of Frito Pie with no complaints, but after tasting the more sophisticated version (if you can actually say that about a recipe that's main ingredient is manufactured by Frito-Lay), I'm definitely not going back. It's super creamy and oh-so-easy.. if you have a functioning oven, that is.

Oven-Baked Frito Pie

Ingredients:

1 lb. ground beef
1 can (16 oz) chili beans
1 can (8 oz) tomato sauce
1 can (15 oz) diced tomatoes
1 envelope taco seasoning
1 cup shredded cheddar cheese (I eyeballed this amount and probably used a bit more than a cup)
3 1/2 cups corn chips (also eyeballed and used more than 3 1/2 cups to adequately cover the chili mixture)
1 1/4 cup sour cream (I needed the full 16oz. but the amount used depends on how creamy you'd like it)

First brown and drain the ground beef in a large pan. I used a 85% lean mixture, but next time I'd pick an even leaner variety, because too much of the meat's bulk was cooked off.


While the beef is browning I covered the base of a 9x13in. pan with Fritos (be sure to use the Originals, not the "Scoops").


Next stir the chili beans, tomato sauce, taco seasoning mix and 1/4 c. of cheese into the pan with the browned and drained beef.


Bake at 350 for 20 minutes.

Now remove from the oven and spread enough sour cream, Fritos, and cheese over the top of the casserole dish to cover it. I had to use more of both ingredients than the recipe called for in order to do this.

Return to the oven and cook for 5 more minutes, and it's ready to serve!

Now eat up, and don't stop until this is all that remains:


So good!

(Recipe from Sweet Treats and More)


1 lb. ground beef
1 can (16 oz) chili beans
1 can (8 oz) tomato sauce
1 can (15 oz) diced tomatoes
1 envelope taco seasoning
1 cup shredded cheddar cheese
3 1/2 cups corn chips (Frito's)
1 1/4 cup sour cream

Directions:

Cook ground beef until meat is browned; drain. Stir in beans, tomato sauce, taco seasoning mix and 1/4 c. of cheese. Sprinkle 1 cup corn chips in bottom of 8x8 baking dish or 9x13 dish. Cover with chili. Bake at 350 for 20 minutes. Spread sour cream over chili. Top with remaining corn chips and cheese. Bake 4-5 minutes longer.

Makes 6 to 8 servings


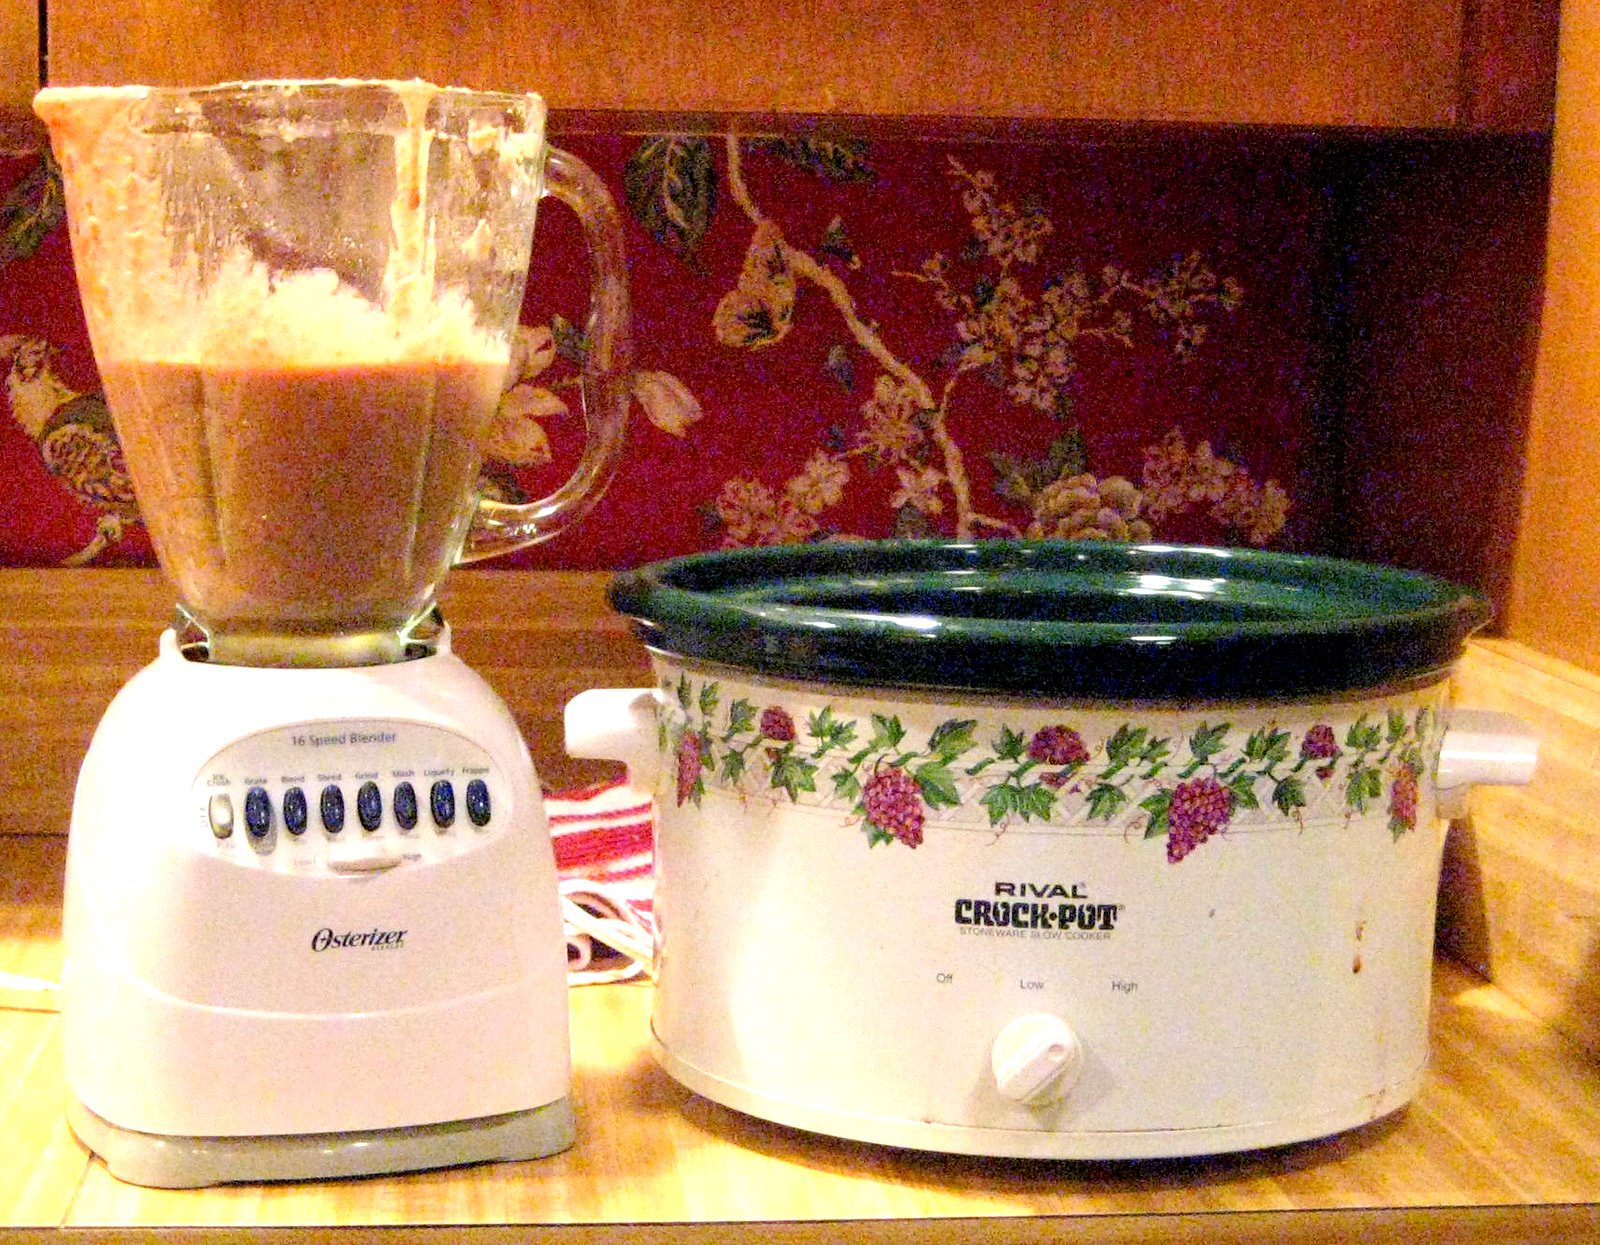
I guess this technically could have been a meal all in it's own, but that morning I'd thrown some pinto beans in the crock pot as an experiment and decided to get really crafty with them at this point. I roughly followed the directions here, where Kalyn of Kalyn's Kitchen tested whether soaking the beans before putting them in the crock pot really made that much of a difference (spoiler alert- it doesn't). And since we've already determined patience isn't my strong suit, the non-soaking method worked perfectly. I should have pre-seasoned the beans and water they in before they cooked because seasoning them post-crock pot didn't quite suffice.

To begin,I placed  two cups of dried pintos in the crock pot with enough water to cover all of the beans and cooked on high for about 8 hours. When the beans were done, I drained them, reserving the liquid, and placed about half a cup at a time in the blender pulsing them on the "mash" setting, adding the reserved water as needed to keep them from sticking to the blades. Periodically I'd add dashes of salt, pepper, and garlic powder to taste, but again, I feel like the flavor would have been much better if the seasoning had been done prior to cooking the beans.


The ingredients


After the mashing was over, I added some cheese and stuck them in the oven for about 5 minutes. Looking good!

This process yielded ultra-smooth and rich "refried" beans, but it wasn't without a little extra work. It was a hassle to do them only one half-cup at a time, and it was tricky to guess the perfect ratio of beans and water. Plus, transferring the beans from the crock pot to the blender, then to a serving dish added more mess to clean up. But if you're more concerned with the appearance of the finished product than the ease of preparation, this is a great way to ensure restaurant-style beans without the sore arms that come from mashing the beans by hand.


Like I said earlier, I really deal with some pride issues. I hate asking for help or admitting I'm wrong, to God or to anyone else. Whether it's asking for driving directions or help with statistics homework, I'd much rather spend two extra hours figuring it out on my own than take two minutes to get some much-needed assistance. Not a biblical approach to life by a long shot. Proverbs, and the whole Bible for that matter, is chock full of warnings to those who refuse to accept correction, advice, and counsel. I mean, Proverbs 15:10 says that those who hate correction will die. Whoa.. that's a scary one 

So why is it so hard to do? Probably because it's absolutely necessary in order to live a full life in Christ, and those things take sacrifice. Jesus Christ Himself took direction and advice from His Father, so what makes me think I'm immune?

But yet, I still refuse to read directions and end up breaking ovens. It's insane.

So when I look at the things I've done, both big and small, out of an "I-know-better-than-you-Lord" attitude, my heart aches.. badly. Pride really does come before destruction & disgrace (Proverbs 16:18 and 11:2) , and it shows me truly how far I am from where I want and need to be. If I want to be used by God to do the things He has for me to do, I can't refuse to do follow His lead. It doesn't work that way.

And I can't fix this one on my own

It's at this point that I start to see how much I don't have figured out, and how much I need my Jesus' direction. The pride begins to melt away and I can't pretend I've got all the answers any more. The song "Busted Heart" by For King and Country says exactly what my heart is feeling right now in it's beginning lines-
"Winter has come back again
Feels like the season won't end
My faith is dying tonight
And I won't try to pretend
I've got it all figured out

I don't have any doubts
I've got a busted heart
I need You now"

But in the midst of the shame and confusion, this truth emerges, with all the hope I need in order to continue pressing on-
 "Hold on to me until it comes to an end
Soon this season will end
I'll surrender tonight
You meet me right where I am"

He meets me right where I am, and He'll take me to the places I'm not yet. And this, my friends, is a beautiful, beautiful thing.


Thursday, December 8, 2011

Happy birthday Dad!- Beer & Bacon Pancakes & Decoupaged Photo Tray

I have an absolutely AMAZING dad, who just so happened to be born 61 years ago today. And I can't say enough about this guy...


Is he perfect?
Nope

Do we get along 100% of the time?
Hardly

Am I pretty sure he wishes he could send me back for a quieter, saner, more cooperative model most days?
Oh yeah

But could I have asked for a better man to show me what unconditional love and continuous forgiveness looks like?
Not in a million years.

But he does have one itsy-bitsy, teeny-weeny fault- it's impossible to buy a gift for him. Not that he's picky or particular. Just the opposite, actually. He never needs anything. He has a closet full of shirts, too many ties to count, and is perfectly happy with his current assortment of electronic devices and power tools. Usually my default gift is a box of malted milk balls (his fave) and some sort of gift card (which he usually ends spending on my mom, brother, or I instead of himself anyway). So this year I thought I'd put my new found craftiness to good use.

My dad's a sucker for a good TV show (what dad isn't?) and he's not going to let dinnertime get in the way of a new episode. When I was home for Father's Day this summer I noticed that his TV tray of choice was an old rusty cookie sheet (points for resourcefulness), so I scoured the streets of Abilene looking for something better. Everything I found was either licenced by Disney or more for show than supper, so I settled for a plain white plastic number, embellished with a few stickers to add a "personal touch" (the extent of my pre-pinterest creativity.. pathetic doesn't even come close). And bless his sweet heart, he loved it.

Last month when I moved back home I found that the much-used tray was looking a little shabby..

See what I mean?

My pathetic attempt at personalizing

So I decided to give it a modge podge n' memories makeover.

First, I sorted through 22 years worth of pictures to find the sweetest daddy-daughter moments:


... then printed them off on this baby:

Mom's newest toy- Canon PixmaPro9500, AKA the beast of photo printers


.. and glued them to the tray. We have a winner!


Here are the deets:


Photo Collage Tray

Gather your supplies:

Modge Podge
Clean and dry plastic tray
Numerous photos of all shapes and sizes


Before busting out the Modge Podge, experiment with different layouts to find the best one. I'm a little bit OCD when it comes to symmetry and evenness, so this took a while.


When you're satisfied with the picture's positions affix them to the tray with modge podge. I removed them one section at a time so that I wouldn't forget where they'd been originally placed.

When all of the pictures are attached, I apply a generous layer of modge podge to coat them all. It helps to do this a section at a time as well so that you can make the surface as smooth as possible. Make sure to get the excess goop out of the crevices between the pictures and in the corners of the tray.

Let this layer dry completely, then add another, making it very smooth.


After the tray is fully dry (I let mine sit overnight), fix up some yummy food and show off your handiwork! Like a birthday breakfast, perhaps?


My dad's the king of breakfast, specifically pancakes. He can somehow take the recipe on the back of a Bisquick box and turn it into a meal that puts IHOP to shame. I've tried and tried to recreate his signature dish with no avail, so I decided to switch it up a little bit.

I made beer & bacon "Mancakes" for my brother and his roommates when I visited him at school last fall (because what college boy doesn't like beer, bacon, or breakfast for dinner?), and they were a huge hit, so I decided to put them to the ultimate test... dad-pproval.

Verdict? They passed with flying colors. And besides the fact that cracking open a Coors at 7:30am makes me a bit uncomfortable, they'll be on our breakfast (and lunch.. and dinner) menu again very soon.


Beer and Bacon "Mancakes"
find the printable recipe here


Ingredients:
  • 1/2 lb bacon, about 8 slices (I used turkey this time, because the first time I made these there was too much fat and not enough usable meat on the regular bacon)
  • 1/3 cup packed brown sugar (I eyeballed this one. A couple of handfuls is sufficient)
  • 2 cups Original Bisquick® mix
  • 1 cup of your favorite regular or nonalcoholic beer (I used regular Coors because it's cheaper and all the alcohol is cooked out anyway)
  • 2 eggs

Directions:

Preheat the oven to 350. While it's heating up, line a baking sheet with tinfoil and arrange bacon in one single layer.


When the oven's ready, bake for 10 minutes (or less if you're using turkey bacon. I learned this the hard way. 7 minutes worked well).

Sprinkle bacon with half the brown sugar (or just grab a handful and sprinkle away like I did). Return to oven and bake another 10 minutes (or 7 with turkey bacon).


Flip bacon over and do the same to the other time. Return to the oven one last time and bake for 10-15 (7-10) minutes. Remove and let cool completely. I was kind of short on time so I popped them in the fridge while I made the batter. Worked like a charm.


Crumble cooled bacon and add it to the mix.


Drop heaping spoonfuls of batter onto a greased skillet.


Cook each side until the edges are crusty. After both sides are browned, press down on the middle with the flat bottom of your spatula to make sure all of the batter on the inside is fully cooked. Mine looked done on the outside, but I'm assuming that the extra yeast in the beer made them rise in the middle a bit and not get fully cooked. Pressing down on them squeezes any uncooked batter to the edges and allows you to brown it as well.

Repeat for as many pancakes as you have batter for. For me, the mix yielded 5 medium-sized cakes.


While the pancakes were cooking, I popped another tray of bacon in the oven (the only way I am ever cooking bacon from now on.. it is SO EASY and they turned out PERFECT) and whipped up a few eggs (tips found here: add a tablespoon of milk per egg, whisk until your hand's about to fall off, and add to an already-warm pan). Add a good cup of coffee to the mix and you've got a breakfast fit for a king.. or a birthday boy :)

YUM!


Proof that the Pancake King highly approved. And please ignore the "I don't own a hairbrush" look I have going on. Cooking a decent meal still equals running a 5K in my book, and I'd barely made it to the finish line.


Like I said, I have an earthly father that can't be beat. He has shown me the love and unconditional acceptance that's helped me truly understand how my heavenly Father loves and accepts me in the midst of my sins and struggles. And that is something for which I am eternally grateful. He's my hero, my encourager, and my biggest fan.. and when I grow up, I want to be just like him :)


There is a new-ish movie out by the makers of Fireproof named Courageous, and it is amazing.. if you and the special men in your life haven't seen it, do. There is a song with the same title by Casting Crowns that speaks to men stepping into their God-given destinies as fathers and husbands, and I feel like it fits so well today. I am blessed beyond belief to have a dad that lives courageously every day. Every time I hear these lyrics, it brings tears to my eyes, because I know how much he's fought for me over the years (and believe me, it's been a battle)-

"This is our resolution, our answer to the call, 
We will love our wives and children, we refuse to see them fall. 
We will reignite the passion that we've buried deep inside, 
May the watchers become warriors, let the men of God arise"


I love you daddy :)


Wednesday, December 7, 2011

It's Just Too Easy- Decoupaged scrap paper ornament & the Barefoot Contessa's New York egg cream

Ever had one of those days where there's ninety-trillion things that you need to be doing, therefore you end up doing anything but? That's been my life lately.. not good. I knew it couldn't be Biblical to chronically procrastinate, so the other morning I woke up at the crack of dawn and searched the Bible cover to cover groggily headed to Google and typed, "What does the Bible say about procrastination?" It took me here, BackToTheBible.org, which had some great and
convicting points-

  • We are to be imitators of Christ, who didn't delay in doing anything His Father set before Him. He knew how valuable every second of every day was, and He never failed to take advantage of the time He'd been given.

  • God created us with potential that can only be fully found when we're serving Him with everything we've got. It's hard for me to see how getting my laundry done or responding to the emails that have been piling up in my inbox qualifies as stepping into my God-given potential, but it makes sense when I remember what Jesus says in Matthew 25:21 and Luke 16:10 about those who can be trusted with very little being able to be trusted with very much. If I can't discipline myself to load the dishwasher and study for tomorrow's exam, how can I expect to be able to handle the things that eternally matter in the way God created me to handle them?

  • And lastly, time is limited. Ain't that the truth? There have been too many reminders of that lately. When my days and deeds are read before the throne, I would really rather hear less of how I updated my Facebook page for the 569873th time and more of how I listened to the Lord and acted accordingly

Again, conviction. And I wish I could say that I changed my tune immediately.. my car's half-unpacked trunk and the mound of unfinished Christmas presents staring me in the face right now would rat me out if I tried.

Dang you, sinful nature.

But I'm trying. And actually, today I was pretty successful. So when mid-afternoon rolled around and I needed a break, I decided do a few quick-and-easy DIYs that are perfect for all the cash-and-time strapped of us out there.


Since I'm kind of a hoarder when it comes to saving cute tissue paper (as in, I have drawers full of it that I can't make myself get rid of), and since I'm still in love with this guy-


 I decided to make use of both. Add a little Elmer's Glue Stick and Modge Podge in on the action and viola- 15-minute Christmas tree ornament that costs next to nothin'.


Decoupaged scrap paper ornament
Supplies:
-Clear glass ornament
-Colored tissue paper
-Glue Stick
-Modge Podge
-Brush


Cut one sheet of tissue paper up into small square pieces.


Take the topper off of your ornament, then use your glue stick to spread a line of glue around the ball. Be generous, because you want your tissue to stick well.


Start sticking tissue paper squared on the line. Don't be afraid to overlap, and don't worry about getting them even. It works better if they're layered.


Continue this process until you've covered the ornament, then fill in any blanks in the same manner.


 Modge Podge the whole thing. Try to brush it on in the same direction the tissue paper is going so there aren't any big bumps. Smooth out any excess.


Let it dry thouroughly. I found that a bendy straw stuck in a cup (especially if that cup has some beautiful burnt orange horns on the front) make a great drying apperatus. Hey, I'm nothing if not resourceful ;)


After it's dry, pop the topper back in, stick a big ole' bow on it, and hang it on the nearest tree! I added some sparkly puff paint to up the pizzazz factor. Lovin' it!


And while we're going with the the quick-easy-cheap theme, I'd like to introduce you to my new favorite way to satisfy a sweet-tooth craving... the New York Egg Cream.

I found the recipe in Ina Garten's (aka the Barefoot Contessa. Check her out here) cookbook, How Easy is That?, which is filled with easy-to-make recipes that seem fancy enough to have taken hours (savory coeur a la creme or spaghetti aglio e olio, anyone?).

I'll take two.


New York Egg Cream
from The Barefoot Contessa's How Easy is That?


Fox's U-bet chocolate flavored syrup (this po' girl's hershey's worked just fine)
Cold whole milk or half-and-half (I used 2%)
Ice-cold club soda or seltzer water


Pour 3 tablespoons (or just go ahead and squirt as much as your little heart desires, because we all know you can never have too much chocolate syrup in anything) chocolate syrup and 1/4 cup milk of half-and-half into a 16oz. glass. While beating vigorously with a fork, slowly add club soda until the glass is almost full. add a straw and serve very cold.


No pictures for this one, y'all.. it was gone faster than you could say, pour me seven more. I wasn't quite satisfied with the sweetness level so I added a few packets of Splenda to the mix. It tastes a lot like a "poor man's milkshake" (Anyone else ever had one of those? My dad makes them all the time- cold milk, a spoonful of sugar, and a generous amount of chocolate syrup- stir until frothy and sip through a straw), and since club soda is cheaper than milk it would be less expensive too. Perfect


As I think about the battle it's been to kick this procrastination habit, a song by Chris August comes to mind. The title, Battle, is pretty self explanitory, but it's the last line of the chorus that says it all-

"Life's a fight of wrong and right that tearing me apart,
but it's what the cross has done;
The world will try to battle for my heart,
but the war is already won."

Yes and amen


And just because it cracks me up every time, this is a video from one of the freshman orientation sessions we had when I was in school warning us about the evils of procrastination. It's terrible quality, but listen closely.. it'll be worth it. Couldn't have said it better myself :)


Until next time,
 

Sunday, December 4, 2011

Keepsake ornaments & Down South Barbecue in the Crock Pot


First real attempt at this crafty-cooky-bloggy thing. Here goes nothing.

Christmas confession: I'm kind of obsessed with these things-


It's probably because they're so much like me- classy, yet versatile (again, jokes.. more like transparent, easily broken, and uncooperative). But whatever the reason, as I was working on a Christmas present involving one of these suckers the creative juices started flowing, and this little memory-and-space-saver was born.

LOVE IT!
The 3.5 followers of my other blog might recall that I was buh-lessed with the opportunity to be a bridesmaid in one of my best friend's wedding in October in my soon-to-be home state of Georgia (you can read about it here). The whole thing was so full of thought and details that made every aspect of it special and personal, right down to each individual bouquet carried by the bridesmaids. The bride-to-be took the time to choose a special little charm-thing (not sure what to call it.. anyone?) that represented her relationship with each girl and presented it to us the night before the wedding. We tied it to our bouquets so that there would be no confusion as to whose was whose in the craziness of the wedding day. What a good idea! They definitely did their jobs well, because when the room we were getting ready in ended up looking like the aftermath of a hurricane, things got a little hard to sort out.

The bouquet was made out of silk flowers (another great idea to any brides-to-be out there), which means each of us took ours home to remember that awesome weekend.. but instead mine has been getting squashed and misshapen in an over-stuffed packing box ever since. I've wanted to display it somehow because it holds so many great memories.. but what? It doesn't it fit with any of my room's decor, and even if it did, it's not a tiny thing and my room is anything but spacious. How could I make this glorious thing fit in my land-locked locale?


The answer? It was a no-brainer.

I know there are about fifty-eleven tutorials for crafts like these floating around in cyberspace written by much more well-versed instructors, so mine's going to be short and sweet.

Keepsake Ornament

Line the bottom of the ornament with a leaf from the bouquet, using a stretched-out paper clip or something similar to get it into the desired position. I was using my pinkie at first, but the ornament's opening has some stinkin' SHARP edges, resulting in a nasty cut. I think there might even be some blood in the ornament, but I don't recommend getting that personal with yours. Just sayin.

Then fill it with a variety of whatever else was included in the bouquet.

I replaced the ornament topper and tied the actual tulle that was wrapped around the bouquet's stems to it, finishing it off with the special little charm-thingy hot glued to the center. BOOM. Roasted.


How easy was that? Is your mind not running rampant with what else you could stuff into one of these? I wonder if actual rose petals could be dried right there inside the ornament. Valentine's Day/Anniversary keepsake, anyone? Hmm....

Oh the possibilities!

Now on to some good old-fashioned crock pottery. A few nights ago I was perusing my mom's kitchen looking for things to steal borrow for my new apartment when I came accross this oldie-but-goodie:


And opened it right up to this:


I'm a sucker for anything a) circa 1960s and b) southern, so this little guy instantly stole my heart (sorry SBoM.. you may have some competition ;)), and since I just so happened to have bought a pork roast that was on sale at Walton's Market (Wal-Mart.. you've gotta classy-ify that place somehow) the other day I thought'd I'd give it a shot.

Down South Barbecue

The instructions and pictures below show how I did it. The recipe at the bottom is what came out of the booklet

It was as easy as...

1. Gathering the ingredients:
Ingredients for cooking the meat-
Roast
Water
Onion
Onion powder
Cloves


Ingredients for the sauce-
Minced onions
Bottle of BBQ sauce

2: Setting up the crock pot:

- I sliced up 1 onion and placed it in the bottom of the Crock Pot,

- Poured 2 cups of water over the onions,

- Took the mesh wrap off of the roast (what is that for anyway?), added the 3.5lb. roast to the pot, poked 6 cloves into the top of the meat, and shook on a generous amount of onion powder*


- Cooked it for 6 hours,

- Removed the meat from the pot, cut off the visible fat, shredded the meat, and returned it to the pot,


-Poured the 16oz. bottle of BBQ sauce in the pot and topped it with a tablespoon of minced onion,

-Cooked for another hour and a half, stirring every 30 minutes,

3. Dinner is served!

Easy, healthy, and delish.. my kind of meal :)

Recipe for Down South Barbecue from the 1967 Good Housekeeping's Rival Crock-Pot Cookbook:


2 Onions (I used 1 onion and about 1 T. onion powder), sliced
4-5 lb. pork roast, or fresh picnic ham (I used a 3.5lb. shoulder roast)
5-6 cloves
2 cups water


Put half the onions in the bottom of the CROCK-POT, then add meat and other ingredients with remaining onion on top. Cover and cook overnight or 8-12 hours on low (I cooked mine for 6 on medium)


16oz. bottle of barbecue sauce
1 lg. onion (I used the equivalent amount of minced onion)


Remove bone and fat from meat. Put meat back in CROCK-POT. Add chopped onion and barbecue sauce. Cover and cook an additional 1-3 hours on high or 4-8 hours on low (I cooked mine for 1.5 hours on high), stirring 2-3 times. Serve from CROCK-POT or on large buns.


It was really  great paired with Paula Deen's apple baked bean casserole: 
Ingredients


The finished product. So good!


And these onion roasted red potatoes:

Ingredients


The finished product. I can't ever seem to get my potatoes to
roast evenly. Some were completely burnt and some were
still raw. So frustrating! Any suggestions?

Crock Pot, you never let me down. You're a keeper for sure.


Speaking of not being let down, here's the song has been singing to my heart for the last few days- Down by Mat Kearney. The chorus gives me chills. I ask it a lot..  
"Can you hear when we call, be there where we fall, standing our backs against the wall? Top of our lungs, 'hallelujah!', where pain and love bleed into one. Baby when all you see is darkness, we all need forgiveness"
But man... I am so grateful that His answer's always the same


"Be strong and courageous. Do not be afraid or terrified.. for the Lord your God goes with you; he will never leave you nor forsake you." (Deuteronomy 31:6)
Praise Him.