So as Christmas approached, I went into supriser mode overload. My first victim was that SBOM. You might recall that he was threatened with getting only paint chips after poking fun at my obsession, but I'm not that mean.. he's been a pretty good boy this year, and I already had an idea brewing. He's an avid reader as well as being constantly on the go, so I wanted to make his life a little bit easier by getting him a Kindle.
As I was trying to decide what to make or buy as a case, I came across this idea and decided to go for it. I mean, what's more pleasantly surprising than thinking you're getting a plain, unexciting, old fashioned book and opening it up to find one of those fancy, new-fangled e-readers? Not much comes to mind.
First thing the next morning I headed to Hastings' two-fer (2 for $1) section. I found one for practice (and ended up making a nice little hide-away book of my own) and one for the actual Kindle case. There just so happened to be one about Blackhawk helicopters (SBOM is a Blackhawk mechanic..impressed? me too :) ), confirming that this project was meant to be. Now it was go time.
Hollowed-out Book Kindle Case
On the first attempt I roughly followed this guy's tutorial and noted the adjustments that needed to be made for the actual Kindle case.
**Note: this is not a quick process, and in order for it to come out decent-looking you've got grow an orchard of the fruit of patience. Mine were quite under-ripe, and the results of rushed work can be seen in my test book's imperfections. I suggest DVR-ing a few
What you'll need:
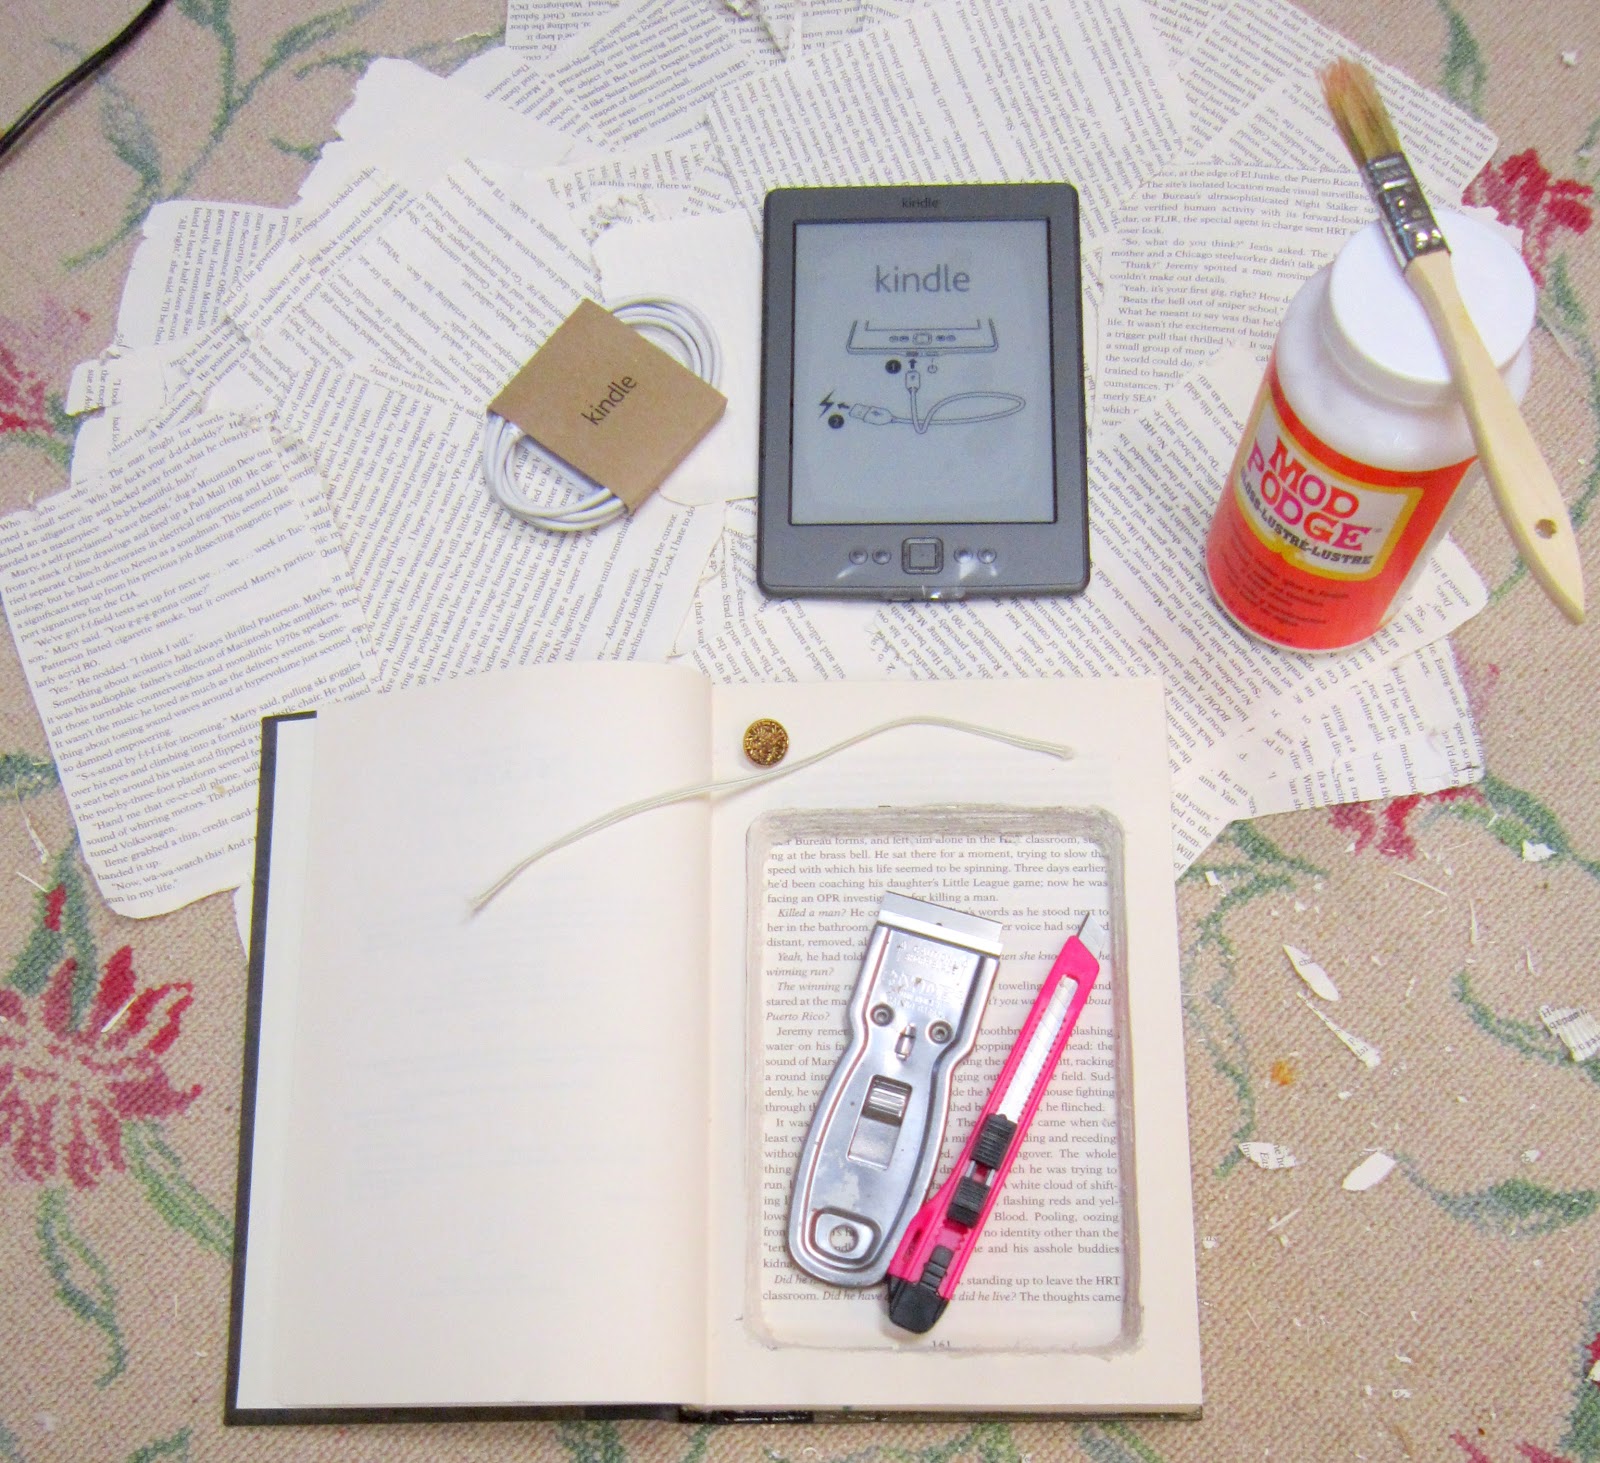
- A book thick enough for your generation of e-book reader, or sufficient for whatever you plan to store in it
- Modge Podge or Elmer's glue-type product (I used Modge Podge)
- X-acto knife and/or box cutter
- Paint brush or sponge (to apply the Modge Podge)
- Optional: something to make the case stay shut. I toyed around with ideas for this and settled on elastic glued to the outside looped around a button (you'll see what I mean at the end). You could also use ribbon, Velcro, or any number of other materials for this part, or nothing at all. Get creative
First, select the page that you want to be the first layer of the hollowed-out part of your book, and save that page to be cut out at the end. Even if you aren't planning on saving any pages at the beginning of the book, you need to set one aside. This is so that the page that is seen when you open the book will look neat and not ragged.
Next, on the following page trace the shape of your kindle in pencil, and then in dark ink make the shape about a quarter centimeter larger than the shape you traced.

Excluding the reserved first page and any other pages you don't want to be included in the cut-out part of the book, hold the rest of the pages together and apply a thick layer of Modge Podge.

Allow this to dry completely, using spacers so that the first pages and front cover don't get stuck. I used some of my most recent Sonic Happy Hour trip's complimentary peppermints, but anything of a similar size will do.

Put some sort of weight on top of the book so that the 'podged pages will stick together tightly (Mom's weird fake plant bulb-filled flower vase worked well for this task.. at least it's good for something).

Now the real fun begins- cutting out the pages.
(I had to invite my Friends Phoebe, Chandler, Monica, Rachel, Ross, & Joey to join me for this part)

Using a strait edge and knife, cut out along the inside of the line. Try to make the cut as vertical as possible. This is a one-or-two page at a time process, so don't try to rush it or get discouraged if it's slow-going. The more quickly you try to do it, the more uneven and jagged the cuts will be. I started out just using my cheap x-acto knife and quickly realized that it wouldn't even be ready for next Christmas if I kept that up so I switched to a box cutter. This cut more pages at a time but left the cut pages looking as if I'd hacked them up with a machete, so I eventually found a happy medium making my big cuts with the box cutter and using the x-acto knife for the corners and to trim up the pages' edges periodically.
I don't have a picture of this part because A) it's hard to hold a box cutter, book and camera all at the same time, and B) I was in the zone. Before I knew it, it was 4am and I was swimming in a sea of shredded book pages still only halfway done.
But press on, because sooner or later, you'll get to the last page. Congratulations! It's all downhill from here.
Now apply a generous coat of Modge Podge on the inside edges of the pages. Use any excess to apply a second coat to the outside of the pages.

Remember that one page you reserved in the beginning? Now it's time to use it. Paint a thin layer of Modge Podge on rim of the already-cut pages.

Make sure that the page you reserved in the beginning is laying evenly and smoothly and close the entire book with the weight used earlier on top. This time don't use the spacers. Let dry another 15-20 minutes.
Cut through the first page that is now glued to the top layer of cut out pages with your X-acto knife. The inside will still be wet, so let it all dry completely before moving on. For the Kindle case I wanted a little bit more of a uniform look so I repeated the last step with a black piece of card stock and trimmed it to size.

There you have it- a hollowed-out book!
I stopped there on my first attempt and made a little jewelry box that adds a little unique flair to my counter top.

 |
| (and now my secret's out- you know where I store all my irreplaceable hand candy. If they disappear one day, I'll know who to blame) |
 |
| You can see the result of my lack of patience in the unevenness and jagged edges here. |
For the Kindle case, I wanted to somehow make it secure so that there wouldn't be a chance that the Kindle could accidentally take a tumble. I toyed with a few ideas before settling on elastic looped around a raised button.
I secured the button to the front cover of the book with hot glue and then did the same with the elastic on the back cover.


*Note- this hasn't been a fail-proof idea. The hot glue hasn't held as well as I'd hoped and the button has a tendency to pop off if there's too much tug from the elastic. Anyone have a better idea? I'd love to hear them!
And the finished product again surpassed my expectations:


Normally when I come across a project as detail-oriented and time consuming as this it's immediately categorized as "Something someone as uncreative as me could never succeed at" and stored away in the "In your dreams" file.
And this attitude doesn't stop at craft projects.
With school it's the "degree someone as mediocrely intelligent I am could never get good enough grades for" category that gets stuck in that same file, along with the categories of "job someone as inexperienced as I am could never excel at" and "friends someone as weird and wounded as I am could never keep".
The list goes on and on, and it's this "In your dreams" file that keeps me right where I am, living unfulfilled, doing only what I know I can be good at, even if in my heart I know that Jesus desperately wants to take the plain, bargain bin cast offs that I cling to and transform them into something with a purpose, just like I did with this project. And slowly but surely, my sweet Lord is showing me that in His power I can take everything labeled as "In your dreams" and re-file it as "Been there, done that".
And I cannot even begin to tell you how amazing that feels.
I've been a Mandisa fan since she showed Simon Cowell the love of Jesus while effectually telling him where to stick it on American Idol a few years ago, and one of her newest songs, Waiting on Tomorrow, tugs at my heart every time I hear it. She asks the question, what am I waiting for? Why am I waiting on tomorrow? Why am I waiting to change and step out into my destiny?
What a good question.. one that I don't have an answer for. If our lives are but a breath (Psalm 39:5), pretty soon there aren't going to be any more tomorrows. So right now I'm going to start living today. It's way past time.
What about you? Tomorrow's here. Let's live it together


