Saturday, December 17, 2011

Pride comes before.. a broken oven- Baked Frito Pie & Blender Beans

I have quite a track record for good intentions gone horribly wrong. Mixed with a chronic lack of patience and my tendency to assume I don't need to follow anyone elses' instructions (can you say pride?), the results can be catastrophic. 

The most recent example of this- while trying to clean the cooked-on gunk out of the bottom of my mom's oven the other day so she could cook her famous oven-roasted candied pecans without filling the house with the smell of burnt grease and goodness-knows what else, I somehow managed to destroy both the top and bottom cooking chambers completely.. just in time for Christmas. Epic fail.  

Turns out I don't know everything. Sorry Scarlet O'Mamma.. and thank you for loving me in spite of myself. You're the best :)


But prior to its demise this old oven had a few shining moments, the latest being an Oven-Baked Frito Pie. I found the recipe here, and adapted it a bit to fit my kitchen (my adaptions are in italics).

I grew up on the traditional chili-and-cheese-smothered-mass-of-corn-chips version of Frito Pie with no complaints, but after tasting the more sophisticated version (if you can actually say that about a recipe that's main ingredient is manufactured by Frito-Lay), I'm definitely not going back. It's super creamy and oh-so-easy.. if you have a functioning oven, that is.

Oven-Baked Frito Pie

Ingredients:

1 lb. ground beef
1 can (16 oz) chili beans
1 can (8 oz) tomato sauce
1 can (15 oz) diced tomatoes
1 envelope taco seasoning
1 cup shredded cheddar cheese (I eyeballed this amount and probably used a bit more than a cup)
3 1/2 cups corn chips (also eyeballed and used more than 3 1/2 cups to adequately cover the chili mixture)
1 1/4 cup sour cream (I needed the full 16oz. but the amount used depends on how creamy you'd like it)

First brown and drain the ground beef in a large pan. I used a 85% lean mixture, but next time I'd pick an even leaner variety, because too much of the meat's bulk was cooked off.


While the beef is browning I covered the base of a 9x13in. pan with Fritos (be sure to use the Originals, not the "Scoops").


Next stir the chili beans, tomato sauce, taco seasoning mix and 1/4 c. of cheese into the pan with the browned and drained beef.


Bake at 350 for 20 minutes.

Now remove from the oven and spread enough sour cream, Fritos, and cheese over the top of the casserole dish to cover it. I had to use more of both ingredients than the recipe called for in order to do this.

Return to the oven and cook for 5 more minutes, and it's ready to serve!

Now eat up, and don't stop until this is all that remains:


So good!

(Recipe from Sweet Treats and More)


1 lb. ground beef
1 can (16 oz) chili beans
1 can (8 oz) tomato sauce
1 can (15 oz) diced tomatoes
1 envelope taco seasoning
1 cup shredded cheddar cheese
3 1/2 cups corn chips (Frito's)
1 1/4 cup sour cream

Directions:

Cook ground beef until meat is browned; drain. Stir in beans, tomato sauce, taco seasoning mix and 1/4 c. of cheese. Sprinkle 1 cup corn chips in bottom of 8x8 baking dish or 9x13 dish. Cover with chili. Bake at 350 for 20 minutes. Spread sour cream over chili. Top with remaining corn chips and cheese. Bake 4-5 minutes longer.

Makes 6 to 8 servings


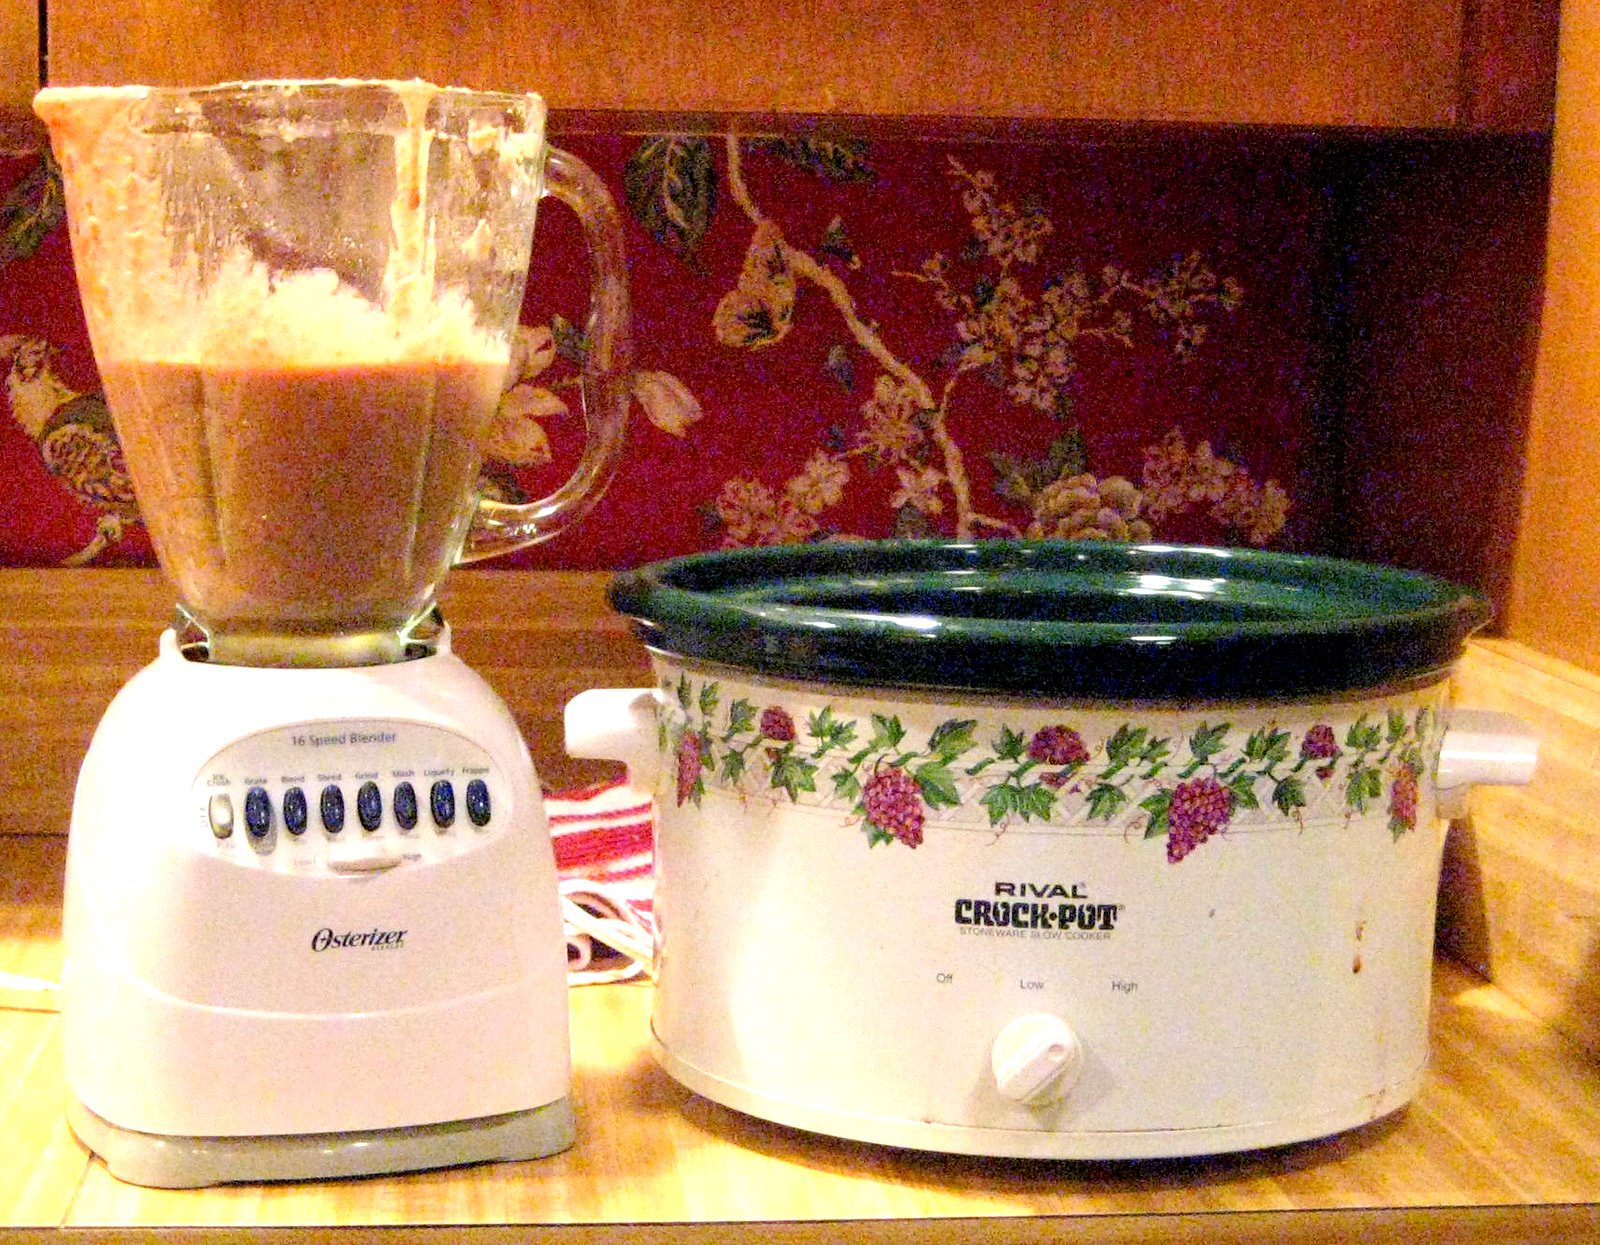
I guess this technically could have been a meal all in it's own, but that morning I'd thrown some pinto beans in the crock pot as an experiment and decided to get really crafty with them at this point. I roughly followed the directions here, where Kalyn of Kalyn's Kitchen tested whether soaking the beans before putting them in the crock pot really made that much of a difference (spoiler alert- it doesn't). And since we've already determined patience isn't my strong suit, the non-soaking method worked perfectly. I should have pre-seasoned the beans and water they in before they cooked because seasoning them post-crock pot didn't quite suffice.

To begin,I placed  two cups of dried pintos in the crock pot with enough water to cover all of the beans and cooked on high for about 8 hours. When the beans were done, I drained them, reserving the liquid, and placed about half a cup at a time in the blender pulsing them on the "mash" setting, adding the reserved water as needed to keep them from sticking to the blades. Periodically I'd add dashes of salt, pepper, and garlic powder to taste, but again, I feel like the flavor would have been much better if the seasoning had been done prior to cooking the beans.


The ingredients


After the mashing was over, I added some cheese and stuck them in the oven for about 5 minutes. Looking good!

This process yielded ultra-smooth and rich "refried" beans, but it wasn't without a little extra work. It was a hassle to do them only one half-cup at a time, and it was tricky to guess the perfect ratio of beans and water. Plus, transferring the beans from the crock pot to the blender, then to a serving dish added more mess to clean up. But if you're more concerned with the appearance of the finished product than the ease of preparation, this is a great way to ensure restaurant-style beans without the sore arms that come from mashing the beans by hand.


Like I said earlier, I really deal with some pride issues. I hate asking for help or admitting I'm wrong, to God or to anyone else. Whether it's asking for driving directions or help with statistics homework, I'd much rather spend two extra hours figuring it out on my own than take two minutes to get some much-needed assistance. Not a biblical approach to life by a long shot. Proverbs, and the whole Bible for that matter, is chock full of warnings to those who refuse to accept correction, advice, and counsel. I mean, Proverbs 15:10 says that those who hate correction will die. Whoa.. that's a scary one 

So why is it so hard to do? Probably because it's absolutely necessary in order to live a full life in Christ, and those things take sacrifice. Jesus Christ Himself took direction and advice from His Father, so what makes me think I'm immune?

But yet, I still refuse to read directions and end up breaking ovens. It's insane.

So when I look at the things I've done, both big and small, out of an "I-know-better-than-you-Lord" attitude, my heart aches.. badly. Pride really does come before destruction & disgrace (Proverbs 16:18 and 11:2) , and it shows me truly how far I am from where I want and need to be. If I want to be used by God to do the things He has for me to do, I can't refuse to do follow His lead. It doesn't work that way.

And I can't fix this one on my own

It's at this point that I start to see how much I don't have figured out, and how much I need my Jesus' direction. The pride begins to melt away and I can't pretend I've got all the answers any more. The song "Busted Heart" by For King and Country says exactly what my heart is feeling right now in it's beginning lines-
"Winter has come back again
Feels like the season won't end
My faith is dying tonight
And I won't try to pretend
I've got it all figured out

I don't have any doubts
I've got a busted heart
I need You now"

But in the midst of the shame and confusion, this truth emerges, with all the hope I need in order to continue pressing on-
 "Hold on to me until it comes to an end
Soon this season will end
I'll surrender tonight
You meet me right where I am"

He meets me right where I am, and He'll take me to the places I'm not yet. And this, my friends, is a beautiful, beautiful thing.


Wednesday, December 14, 2011

The best things in life are free- Paint Chip coasters, cards, & Christmas decor

Let me just say that I'm a sucker for anything free.


Turn me loose in Sam's on a Saturday morning and those sample booths will have me fed for the week.

Once I got a bottle of Ojon (shampoo specially formulized for African-Americans to combat nappy roots) just because I recieved a coupon in the mail (and used it).

And don't get me started on the "free" section of Craigslist. I don't care if I'll never use a mini-Vuvuzela.. if they're giving it away, I'll take it.


So when I discovered the art of crafting with paint chips, i was hooked. Not only are they uuber cute and colorful, by gosh, they're free. Yes and amen.

Fast forward a few months, and I'm pretty sure I'm on the watch list of Wal-mart's paint department. Decorations, cards, gifts.. It's gotten a little out of hand. That SBoM was making fun of me for this obsession the other day, so do you know what he's getting for Christmas? That's right, paint chips (I'm only half kidding.. be on the lookout for that post sometime soon). One of my bigger undertakings is a gift for one the most amazing families I've ever known who I babysat for in Searcy. That one will be a post in itself as well, but here's a sneak peak:


 Stay tuned!


My latest P.C. project was an upcylce of some old drink coasters. I was inspired by this but I needed to use what I had laying around, so the finished product looked more like this:


Here's my version:

Paint Chip Coasters


I had some beat-up, drink-stained Christmas coasters stuffed into a box of decorations from last year that needed a new life, so they became my base. But you could use any sturdy cardstock, cardboard, or cork.


These were made out of thin cardboard.
The supply list wasn't extensive, either. Just some Modge Podge, a glue stick, the coaster bases, and whatever combination of paint chips your little heart desires. My personal fave are the ones only available at Wal Mart because they're long, have great colors, and come in about bajillion and three varieties.

First, slather your coaster base in a generous amount of glue from the glue stick. Be sure to get every little nook and cranny.


I went for the "less is more" look.

Easy as 1-2-3


Next, trim up the edges to match the coaster base.


Then apply a thick, even coat of Modge Podge on the top and sides.


Be sure to get the sides really well so that the paint chips adhere completely.


Repeat as many times as you have coasters and let them dry completely until no stickiness is left.


And you're done!


Now all that's left is to put them to work. My favorite way to do that is with a concoction I made up on a whim recently called a Strawberry Wine Spritzer. Mix your favorite sweet wine with some strawberry flavored carbonated water and half a "to-go" packet of strawberry flavored Crystal Light. Yum!


But the craze doesn't end there. These guys are so perfect for Christmas cards and tags like these:


And a lot of them have Holiday-themed names that add extra flair:


"Polar Bear" and "Sugar Plum"


"Happy Holiday"


"Jolly Holly" and "Christmas Red"

"Warm Gingerbread", "Cinnamon Stick", and "Cinnamon Spice"


And they make great quick, colorful ornaments/wreaths/etc.


You may see me at an addicts anonymous meeting soon, but for now I'm perfectly happy with this little obsession... as is my wallet. You can't get much better than free.


Speaking of free..

There's been a lot on my heart and mind lately, and so much of it makes me think, why in the world would the Lord still forgive me for all of this? I have done so much to hurt His heart (for real, y'all.. it's been a mess), and I still don't have it all together in the least.


Last night when I was talking whining to God, the Holy Spirit hit me hard with the fact that if  I spent half  the time in the Word as I do on Pinterest my life would look a lot different.

Ouch.

But the Truth isn't always comfortable or easy to hear.. And I know that that Truth brings no condemnation. So as the lies flood in about how awful I am and how far from grace I must be falling, the word free begins to grown in meaning, because in Chirst I have recieved so much for free:

Free grace

Free love

Free forgiveness

Free acceptance

Free-dom from condemnation

Free

Free

Free

I am free. Wow. I don't know what that does for you, but my heart can't get enough of that. Jimmy Needham sings many songs addressing this blessed fact, one being "Forgiven & Loved." Part of the chorus is,

"When He died He died to rectify my hopeless situation,
And His blood commands my guilt to flee.
So on calvary I stand, empty pockets, open hands,
Because there is no condemnation for me."

And at the very end he just repeats,
"Child you're forgiven and loved."

Wow. Gets me every time. Enjoy :)


Thursday, December 8, 2011

Happy birthday Dad!- Beer & Bacon Pancakes & Decoupaged Photo Tray

I have an absolutely AMAZING dad, who just so happened to be born 61 years ago today. And I can't say enough about this guy...


Is he perfect?
Nope

Do we get along 100% of the time?
Hardly

Am I pretty sure he wishes he could send me back for a quieter, saner, more cooperative model most days?
Oh yeah

But could I have asked for a better man to show me what unconditional love and continuous forgiveness looks like?
Not in a million years.

But he does have one itsy-bitsy, teeny-weeny fault- it's impossible to buy a gift for him. Not that he's picky or particular. Just the opposite, actually. He never needs anything. He has a closet full of shirts, too many ties to count, and is perfectly happy with his current assortment of electronic devices and power tools. Usually my default gift is a box of malted milk balls (his fave) and some sort of gift card (which he usually ends spending on my mom, brother, or I instead of himself anyway). So this year I thought I'd put my new found craftiness to good use.

My dad's a sucker for a good TV show (what dad isn't?) and he's not going to let dinnertime get in the way of a new episode. When I was home for Father's Day this summer I noticed that his TV tray of choice was an old rusty cookie sheet (points for resourcefulness), so I scoured the streets of Abilene looking for something better. Everything I found was either licenced by Disney or more for show than supper, so I settled for a plain white plastic number, embellished with a few stickers to add a "personal touch" (the extent of my pre-pinterest creativity.. pathetic doesn't even come close). And bless his sweet heart, he loved it.

Last month when I moved back home I found that the much-used tray was looking a little shabby..

See what I mean?

My pathetic attempt at personalizing

So I decided to give it a modge podge n' memories makeover.

First, I sorted through 22 years worth of pictures to find the sweetest daddy-daughter moments:


... then printed them off on this baby:

Mom's newest toy- Canon PixmaPro9500, AKA the beast of photo printers


.. and glued them to the tray. We have a winner!


Here are the deets:


Photo Collage Tray

Gather your supplies:

Modge Podge
Clean and dry plastic tray
Numerous photos of all shapes and sizes


Before busting out the Modge Podge, experiment with different layouts to find the best one. I'm a little bit OCD when it comes to symmetry and evenness, so this took a while.


When you're satisfied with the picture's positions affix them to the tray with modge podge. I removed them one section at a time so that I wouldn't forget where they'd been originally placed.

When all of the pictures are attached, I apply a generous layer of modge podge to coat them all. It helps to do this a section at a time as well so that you can make the surface as smooth as possible. Make sure to get the excess goop out of the crevices between the pictures and in the corners of the tray.

Let this layer dry completely, then add another, making it very smooth.


After the tray is fully dry (I let mine sit overnight), fix up some yummy food and show off your handiwork! Like a birthday breakfast, perhaps?


My dad's the king of breakfast, specifically pancakes. He can somehow take the recipe on the back of a Bisquick box and turn it into a meal that puts IHOP to shame. I've tried and tried to recreate his signature dish with no avail, so I decided to switch it up a little bit.

I made beer & bacon "Mancakes" for my brother and his roommates when I visited him at school last fall (because what college boy doesn't like beer, bacon, or breakfast for dinner?), and they were a huge hit, so I decided to put them to the ultimate test... dad-pproval.

Verdict? They passed with flying colors. And besides the fact that cracking open a Coors at 7:30am makes me a bit uncomfortable, they'll be on our breakfast (and lunch.. and dinner) menu again very soon.


Beer and Bacon "Mancakes"
find the printable recipe here


Ingredients:
  • 1/2 lb bacon, about 8 slices (I used turkey this time, because the first time I made these there was too much fat and not enough usable meat on the regular bacon)
  • 1/3 cup packed brown sugar (I eyeballed this one. A couple of handfuls is sufficient)
  • 2 cups Original Bisquick® mix
  • 1 cup of your favorite regular or nonalcoholic beer (I used regular Coors because it's cheaper and all the alcohol is cooked out anyway)
  • 2 eggs

Directions:

Preheat the oven to 350. While it's heating up, line a baking sheet with tinfoil and arrange bacon in one single layer.


When the oven's ready, bake for 10 minutes (or less if you're using turkey bacon. I learned this the hard way. 7 minutes worked well).

Sprinkle bacon with half the brown sugar (or just grab a handful and sprinkle away like I did). Return to oven and bake another 10 minutes (or 7 with turkey bacon).


Flip bacon over and do the same to the other time. Return to the oven one last time and bake for 10-15 (7-10) minutes. Remove and let cool completely. I was kind of short on time so I popped them in the fridge while I made the batter. Worked like a charm.


Crumble cooled bacon and add it to the mix.


Drop heaping spoonfuls of batter onto a greased skillet.


Cook each side until the edges are crusty. After both sides are browned, press down on the middle with the flat bottom of your spatula to make sure all of the batter on the inside is fully cooked. Mine looked done on the outside, but I'm assuming that the extra yeast in the beer made them rise in the middle a bit and not get fully cooked. Pressing down on them squeezes any uncooked batter to the edges and allows you to brown it as well.

Repeat for as many pancakes as you have batter for. For me, the mix yielded 5 medium-sized cakes.


While the pancakes were cooking, I popped another tray of bacon in the oven (the only way I am ever cooking bacon from now on.. it is SO EASY and they turned out PERFECT) and whipped up a few eggs (tips found here: add a tablespoon of milk per egg, whisk until your hand's about to fall off, and add to an already-warm pan). Add a good cup of coffee to the mix and you've got a breakfast fit for a king.. or a birthday boy :)

YUM!


Proof that the Pancake King highly approved. And please ignore the "I don't own a hairbrush" look I have going on. Cooking a decent meal still equals running a 5K in my book, and I'd barely made it to the finish line.


Like I said, I have an earthly father that can't be beat. He has shown me the love and unconditional acceptance that's helped me truly understand how my heavenly Father loves and accepts me in the midst of my sins and struggles. And that is something for which I am eternally grateful. He's my hero, my encourager, and my biggest fan.. and when I grow up, I want to be just like him :)


There is a new-ish movie out by the makers of Fireproof named Courageous, and it is amazing.. if you and the special men in your life haven't seen it, do. There is a song with the same title by Casting Crowns that speaks to men stepping into their God-given destinies as fathers and husbands, and I feel like it fits so well today. I am blessed beyond belief to have a dad that lives courageously every day. Every time I hear these lyrics, it brings tears to my eyes, because I know how much he's fought for me over the years (and believe me, it's been a battle)-

"This is our resolution, our answer to the call, 
We will love our wives and children, we refuse to see them fall. 
We will reignite the passion that we've buried deep inside, 
May the watchers become warriors, let the men of God arise"


I love you daddy :)